Setup or Install Operating System on the SD card
of the Raspberry Pi
-
Insert the SD card with the unzipped NOOBS package into the SD card slot of the
Raspberry Pi.
-
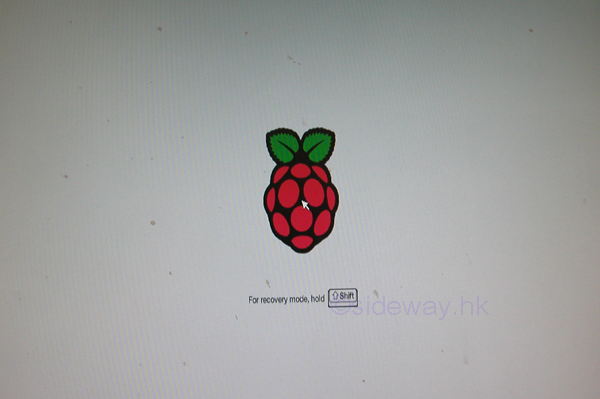
Power on and the first boot begin.
For the current firmware, a coloured splash screen is displayed after the GPU
firmware is loaded and the splash screen is only available on the HDMI port by
default.

-
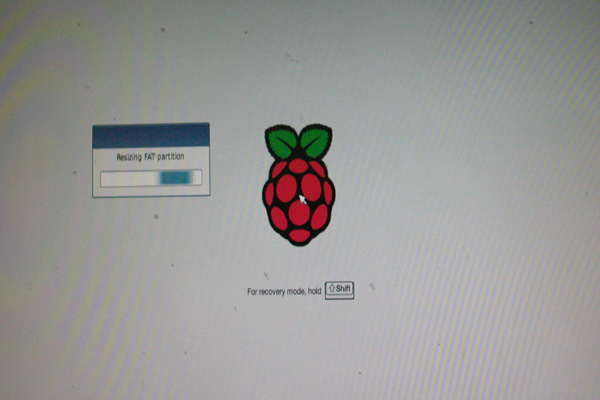
The NOOBS application then display recovery mode screen for entering the
recovery mode by holding the "shift" key. The recovery mode screen is also
available on the HDMI port by default.
-
The bootloader will
take a longer time to resize the SD card when the capacity of the SD card is
large.
-
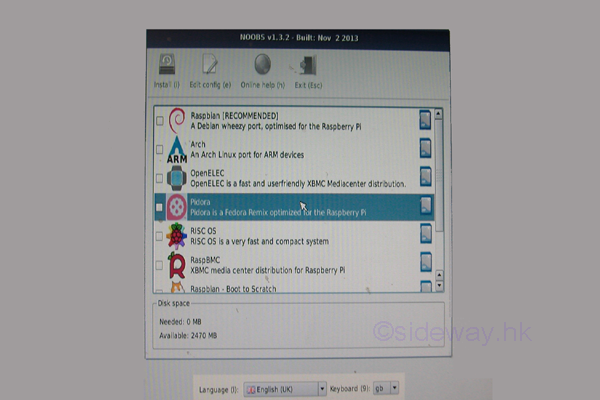
After the
recovery mode screen, the operation systems image installation screen will be displayed for the
selection of image installation. The image installation screen is also available
on the HDMI port by default. The operation systems image installation screen,
the recovery mode,
will also be activated when holding the "shift" key during normal booting.
-
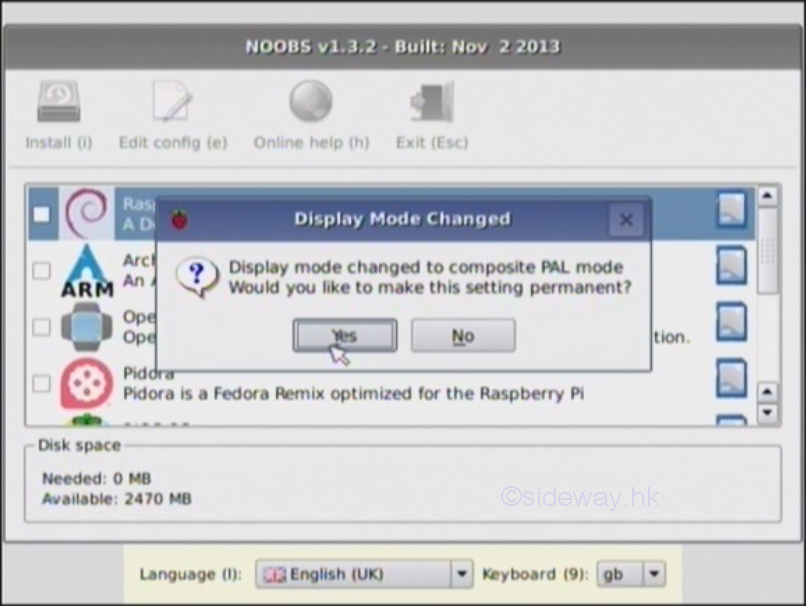
After the recovery mode screen is displayed, the NOOBS application can then be
able to accept the number key 1, 2, 3, or 4 for altering the display mode of the
Raspberry Pi to HDMI. HDMI safe, Composite PAL, or Composite NTSC mode
accordingly.
During the first boot, if there is only blank or black display when
the blinking green activity led next to the red power led goes out, then try pressing
either 1, 2, 3, or 4 on the keyboard can change the output mode of the Raspberry
Pi, where 1 and 2 is the HDMI output while 3 and 4 is the Composite RCA output.
The image installation selection screen can then be outputed accordingly. And a
"Display Mode Changed" message will be displayed also.
-
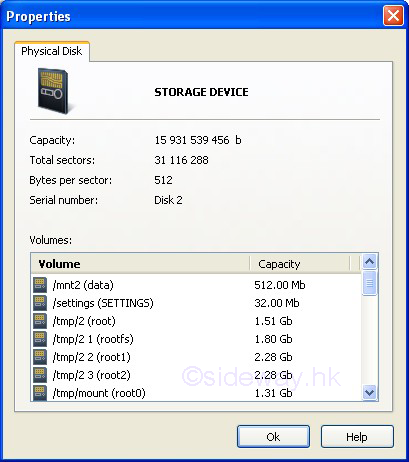
After the first boot and before installing the operating system, the SD card is
resized with an unallocated space in the middle.
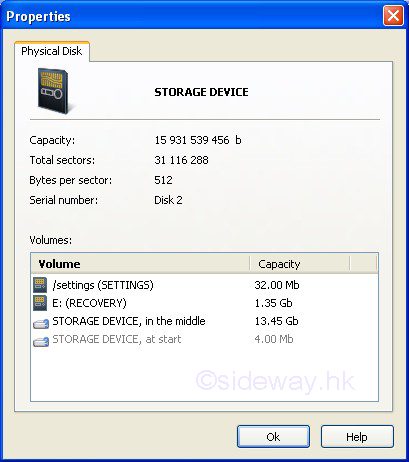
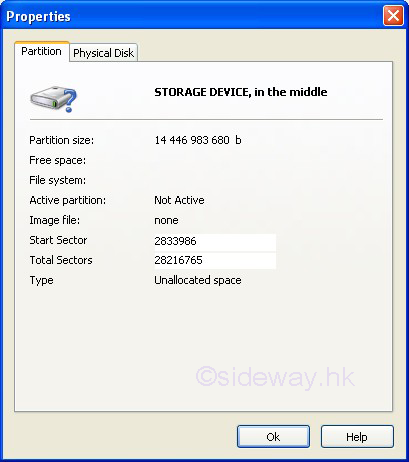
-
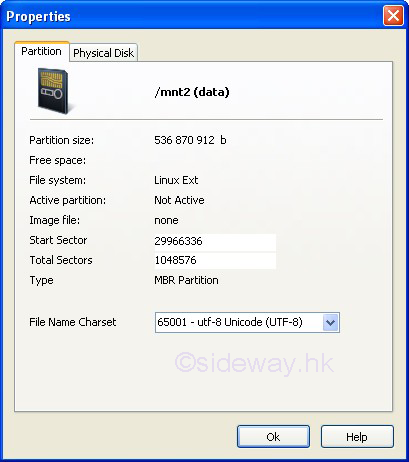
The original partition is renamed to "RECOVERY" and is resized to a smaller
capacity to contain the whole unzipped NOOBS package except the first command
"runinstaller" in the "recovery.cmdline" file is removed.
One more Linux Ext partition, named "SETTINGS", is created.


-
Select
user language, keyboard layout settings, both language and keyboard layout
settings and the selected display mode will be used for OS installation.
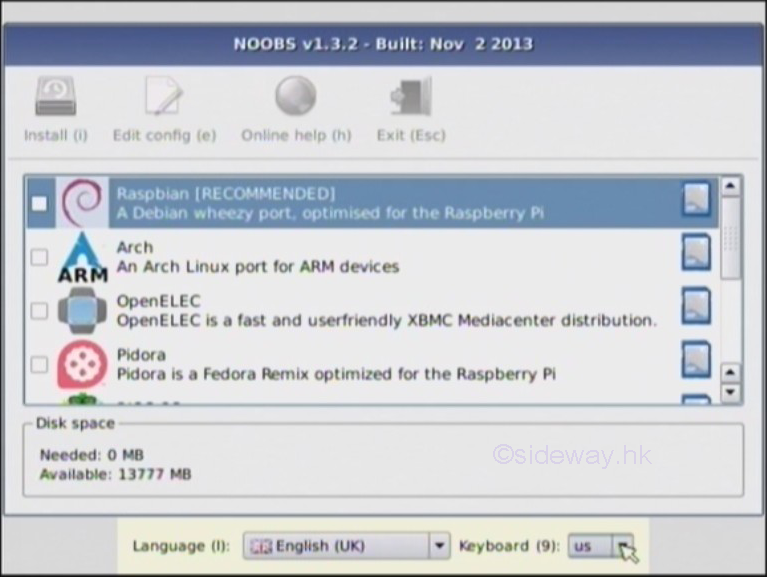
-
Since the capacity of the SD card is 16G, more than one operating system (OS) from the list, generated from the
available operatiing systems in the "/os" directory, can be selected. Use
mouse, or up or down key to highlight the interested OS. Use right mouse button,
or space bar to select the OS. Check the recommended RASpbian, Arch,
OpenELEC, and Pidora.
-
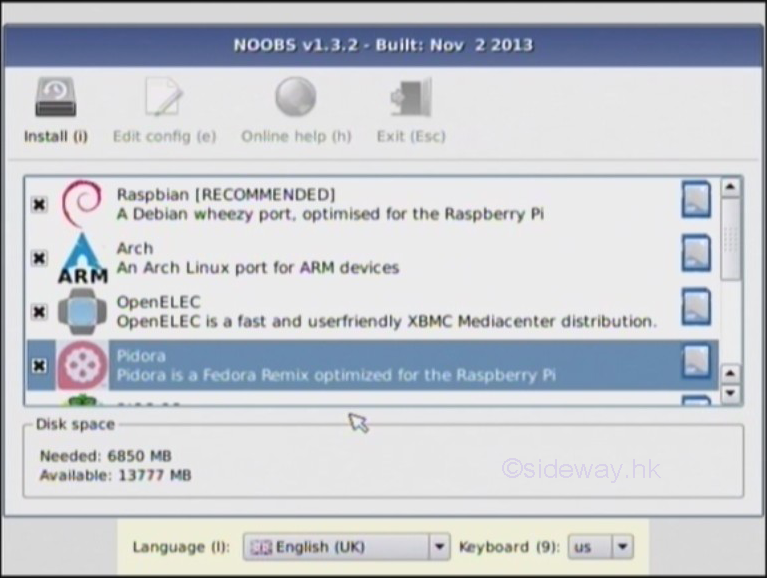
Since there still have space. More OSes, RISC OS, RaspBMC, and Raspbian Scratch, can be installed
in the SD card. Besides a data partition of size 512MB and ext4 format can also
be added to the SD card. Press "Install" button or "i" key to install the selected OS image onto the
SD card.

-
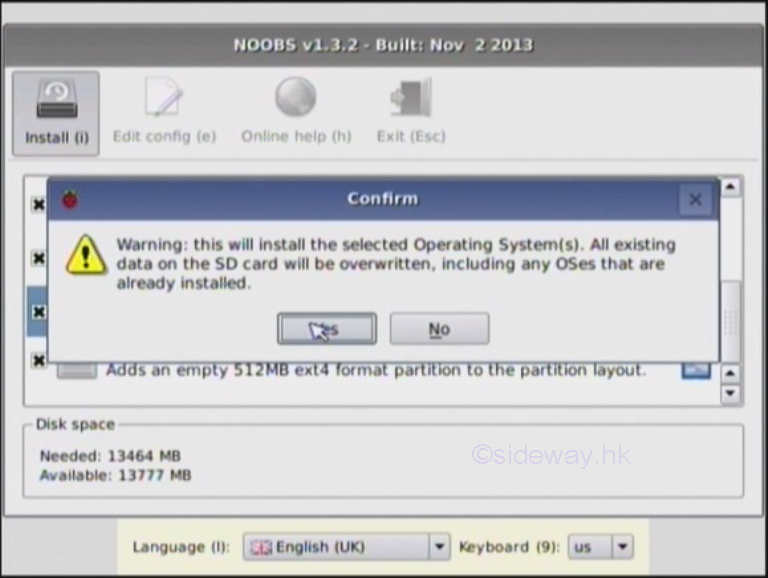
Press Yes button to proceed.
-
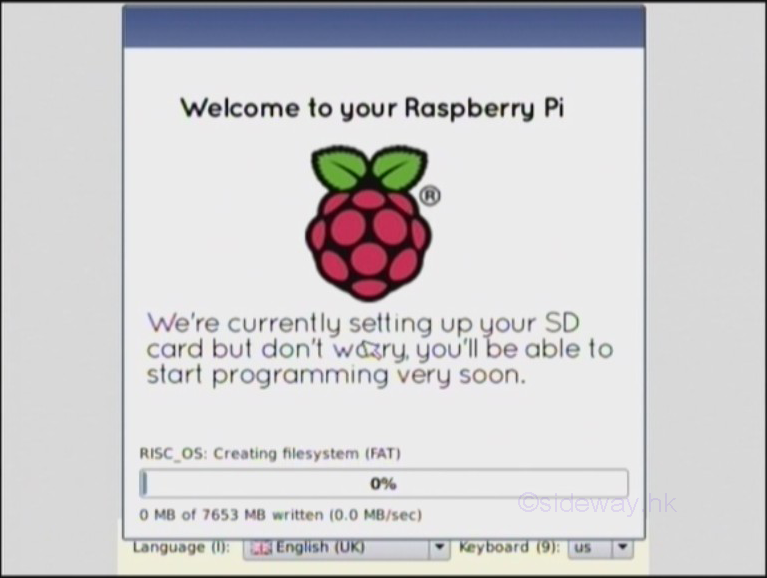
Set up the
SD Card for installing all the selected opersating systems.
-
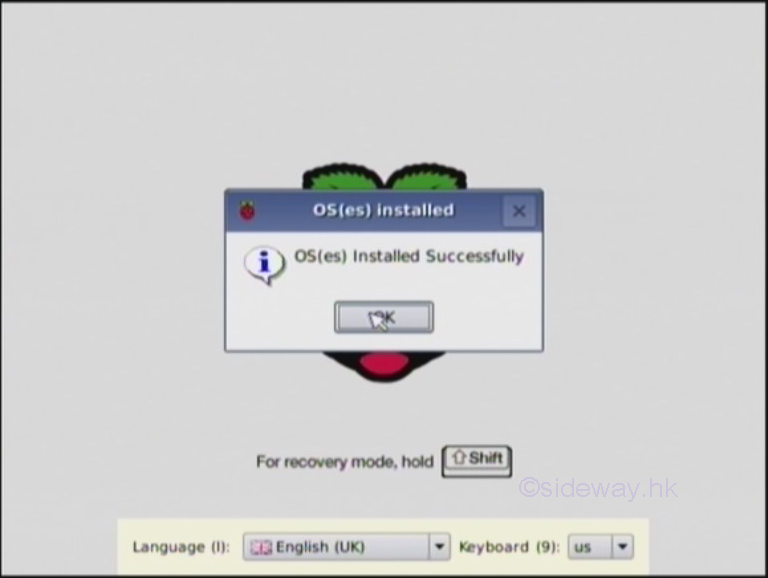
All selected operating system is installed on the SD card.
-
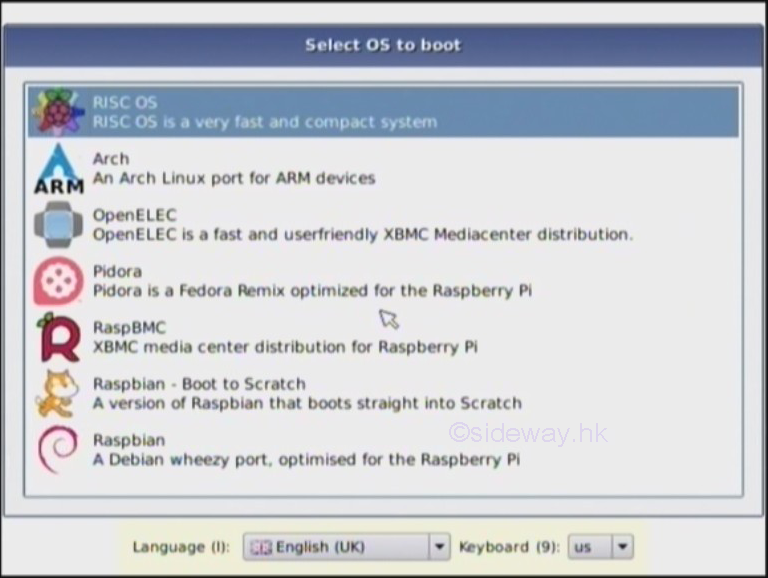
The
Raspberry Pi will then start to reboot. Instead of booting into an installed operating system,
the NOOBS package display the "select OS to boot" menu for selecting the OS to
boot.
-
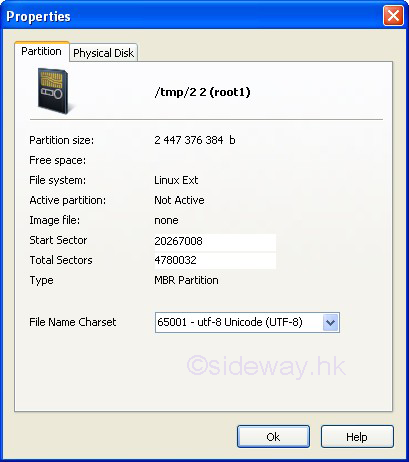
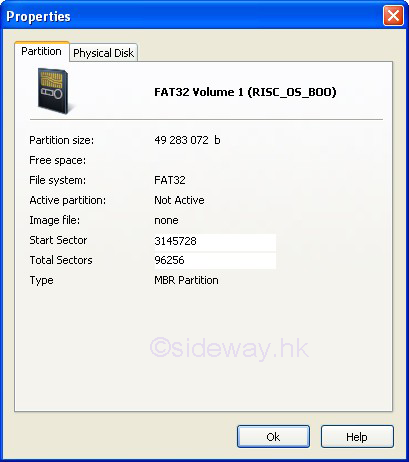
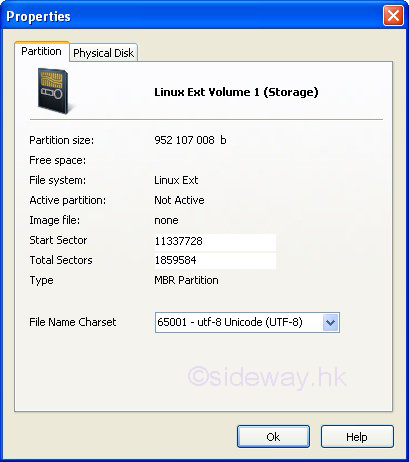
After the installation of
all the operating systems, the SD card is
resized again.
-
More partitions are created onto the SD card


 Sideway
BICK BLOG from Sideway
Sideway
BICK BLOG from Sideway